Flexible Stone Installation
How to Install Flexible Stone Panels
Updated
Installing flexible stone wall panels requires verifying substrate flatness to within 3 mm per 3 m (ANSI A108.02), matching the adhesive chemistry to the panel backing, and consolidating the sheet with a hand roller to achieve at least 80% interior or 95% exterior adhesive contact area (ANSI A108.5). Skipping moisture verification, substrate skimming, or full-system mock-up approval causes hollow-pocket delamination, telegraphing wall ridges, and costly panel tear-out and rework.
Quick Specs & Pre-Release Acceptance Baseline
Scroll the table horizontally to see all columns.
| Control Parameter | Engineering Acceptance Baseline | Verification Standard & Field Check |
|---|---|---|
| Substrate Flatness (Edges >= 380 mm / 15 in) | Max 3 mm in 3 m (1/8 in per 10 ft); <= 1.6 mm in 600 mm (1/16 in per 24 in) | ANSI A108.02 Section 4.1.4.3.1 straightedge & raking-light survey |
| Concrete / Masonry Cure & Moisture | >= 28-day cure; MVER <= 3 lbs / 1,000 sq. ft. / 24 h; retained moisture < 2.5% | ASTM F1869 calcium chloride test & pinless impedance moisture meter |
| Adhesive Trowel & Bed Method | 3/16 in (4.8 mm) V-notch or 4-6 mm square-notch + flat back-butter skim | Parallel unidirectional trowel ridges; center-outward J-roller consolidation |
| Minimum Bond Contact Coverage | >= 80% uniform contact (dry interior walls); >= 95% (approved exterior walls) | ANSI A108.5 lift-check during mock-up; 100% perimeter & corner support |
| Ambient & Substrate Cure Window | 40°F to 95°F (4°C to 35°C) during bonding and for 72 hours post-installation | TCNA W244E / ANSI A108.5 thermal log; shade exterior walls in direct sun |
| Movement & Expansion Joints | Every 20-25 ft (6.1-7.6 m) dry interior; every 8-12 ft (2.4-3.7 m) exterior/sunlit | TCNA EJ171 & ASTM C920 neutral-cure elastomeric sealant over backer rod |
Standard installation engineering baseline. Verify substrate flatness, adhesive compatibility, and mock-up bond performance against the project submittal pack before full wall release.
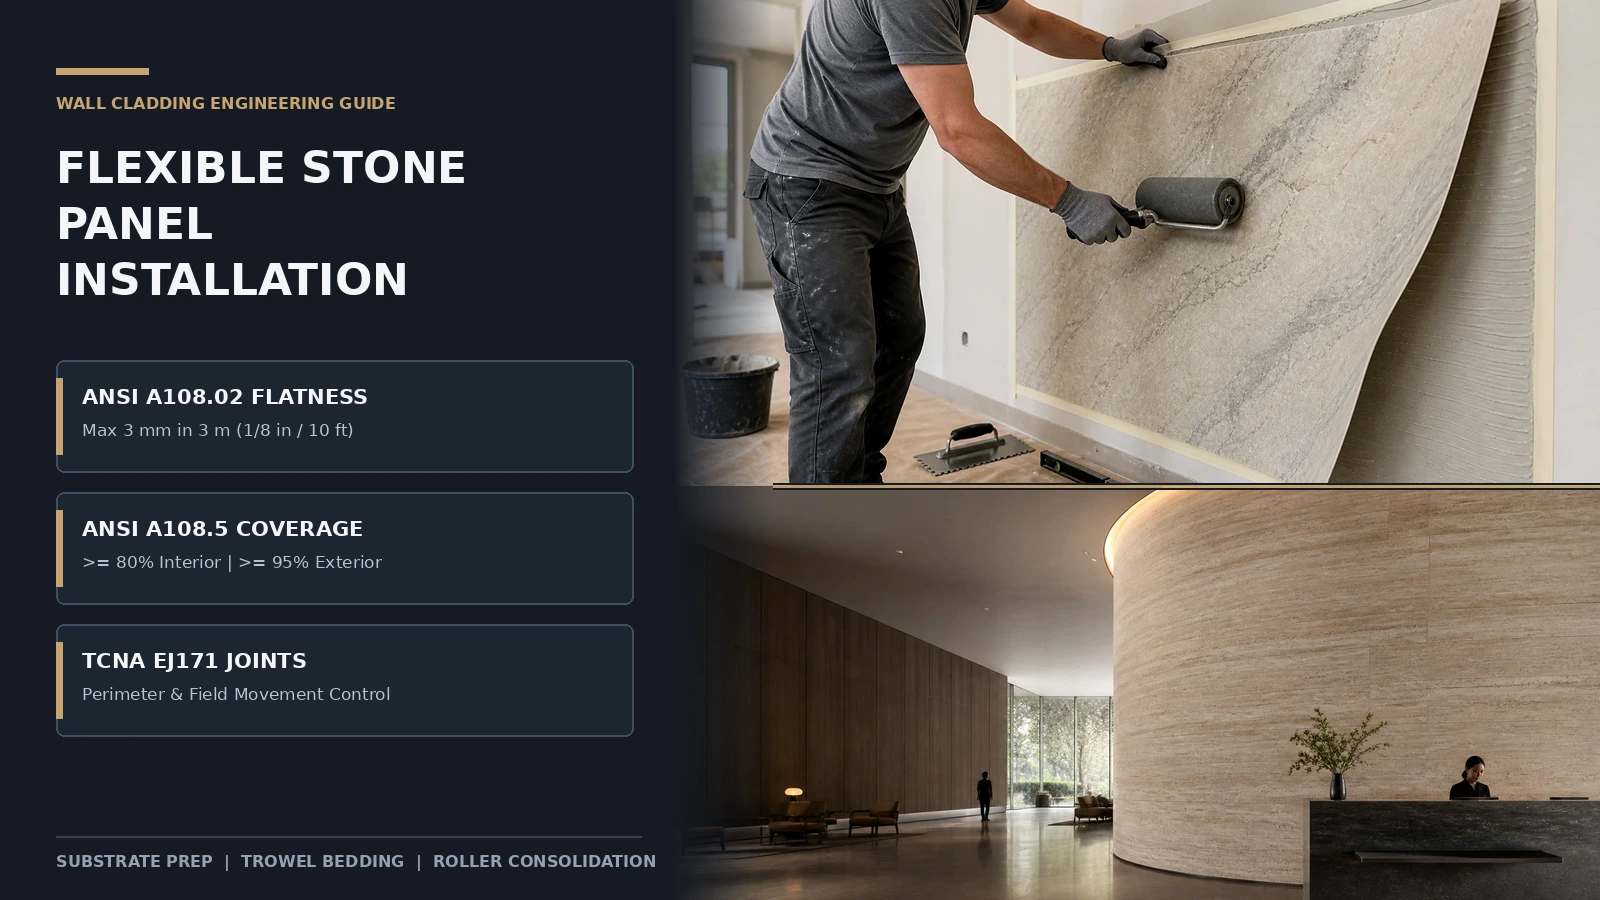
Overview
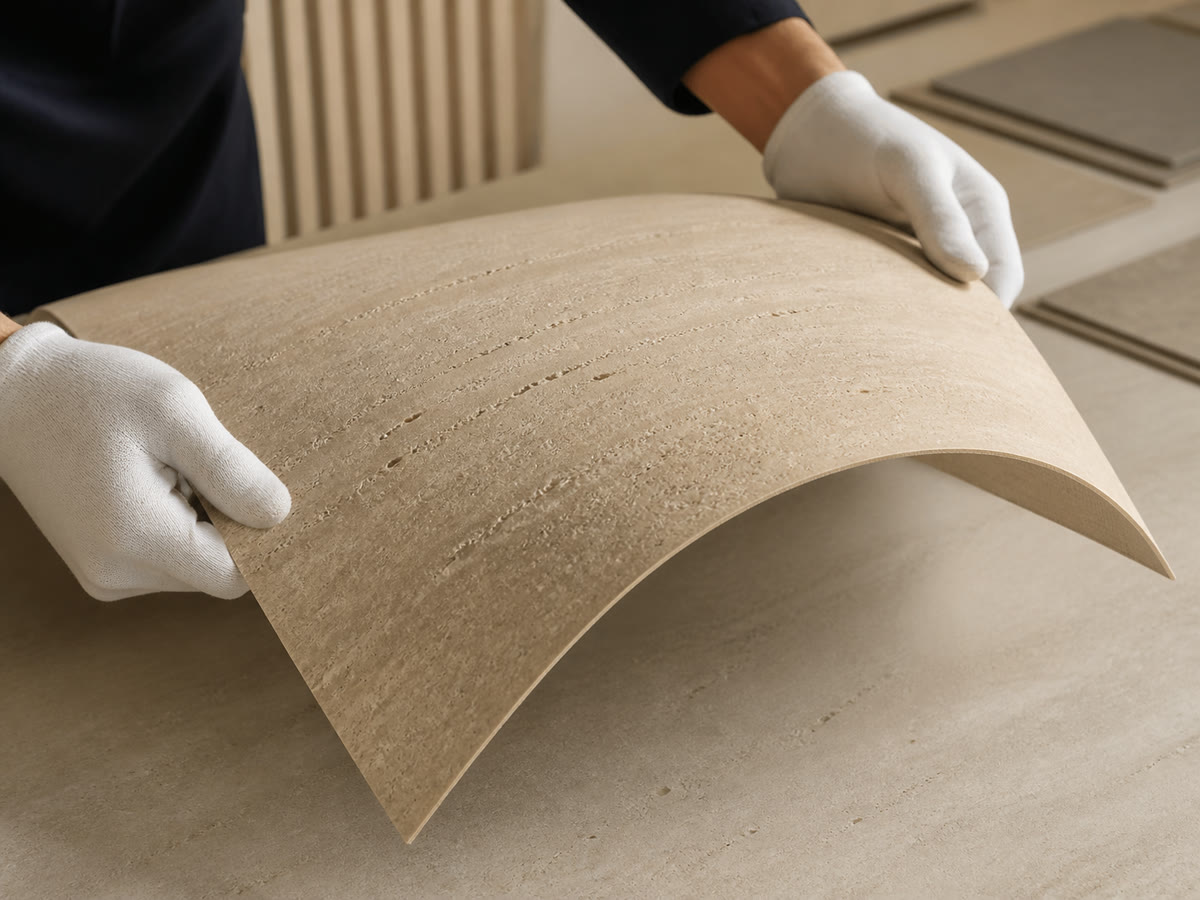
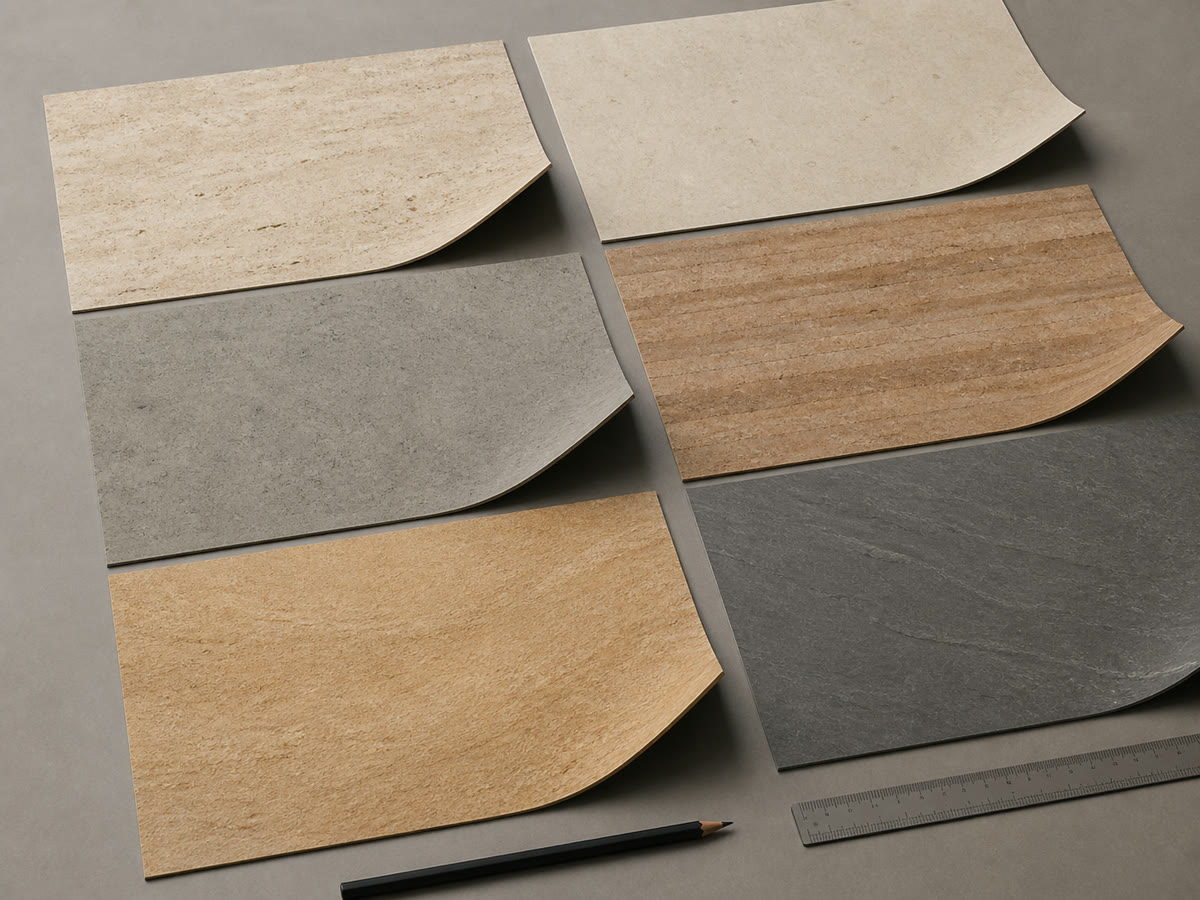
Flexible stone panels combine a real split natural stone face (slate, quartzite, sandstone, travertine, or marble) or modified mineral composite (MCM) layer with a polymer-fiberglass or textile fleece backing at a nominal thickness of 1.5 to 3.0 mm (3.0 to 6.0 kg/m²). Because the cladding is thin, pliant, and low-mass, installation performance is governed by substrate flatness (ANSI A108.02), compatible adhesive chemistry (ISO 13007 / EN 12004), air-free roller consolidation (ANSI A108.5), and perimeter/field movement joint placement (TCNA EJ171).
Use this engineering guide strictly for interior feature walls, commercial corridors, curved columns, suitable renovation overlays, and project-approved exterior wall assemblies. Flexible stone wall sheets are not specified for floors, shower enclosures, wet immersion zones, or unshielded high-heat cooking splashbacks. Review dimensional and bend-radius limits in Dimensions, Weight & Flexibility and order physical evaluation swatches via Request Samples before locking your specification.
| Wall Zone & Substrate Assembly | Recommended Primer & Preparation | Adhesive Specification Class | Notched Trowel & Min. Contact Area (ANSI A108.5) |
Max Movement Joint Spacing (TCNA EJ171) |
|---|---|---|---|---|
Dry Interior Gypsum Board (ASTM C1396) or Primed Plaster |
Sand joint compound flush (<= 1.6 mm / 600 mm); alkali-resistant acrylic primer (0.15 kg/m²) |
High-grab MS-polymer hybrid adhesive or low-VOC acrylic dispersion adhesive | 3/16 in (4.8 mm) V-notch + back-butter skim; >= 80% contact |
20 to 25 ft (6.1 to 7.6 m) on center + perimeters & inside corners |
Interior Curved Columns & Radius Walls (R >= 150-300 mm) |
Smooth curve template; pre-warm fiberglass backing to 120-140°F if cool |
Fast-grab MS-polymer or 2-part polyurethane (EN 12004 R2T) with zero vertical slip |
3/16 in (4.8 mm) V-notch on wall + flat skim on panel back; >= 85-90% contact |
At curve tangents, column base/head, and wall transitions |
| Interior Renovation Overlay (Sound Glazed Tile or Render) | Tap-test 100% of tiles; strip hollow units; degrease, abrade (80-grit), quartz grip primer |
Solvent-free 2-part reaction resin (EN 12004 R2T) or MS-polymer structural adhesive |
4 to 6 mm square-notch + back-butter skim; >= 85% contact |
Align over all existing substrate control joints; max 20 ft (6.1 m) |
Approved Exterior Wall (ASTM C1325 Cement Board / Concrete) |
>= 28-day concrete cure; ASTM F1869 MVER <= 3 lbs/1,000 sq. ft./24 h; weather barrier |
Deformable polymer-modified mortar (ANSI A118.15 / EN 12004 C2TES1/S2) or R2T epoxy-PU |
6 mm (1/4 in) square-notch + 100% flat back-butter; >= 95% contact |
8 to 12 ft (2.4 to 3.7 m) each way + floor lines & window heads |
Details to review
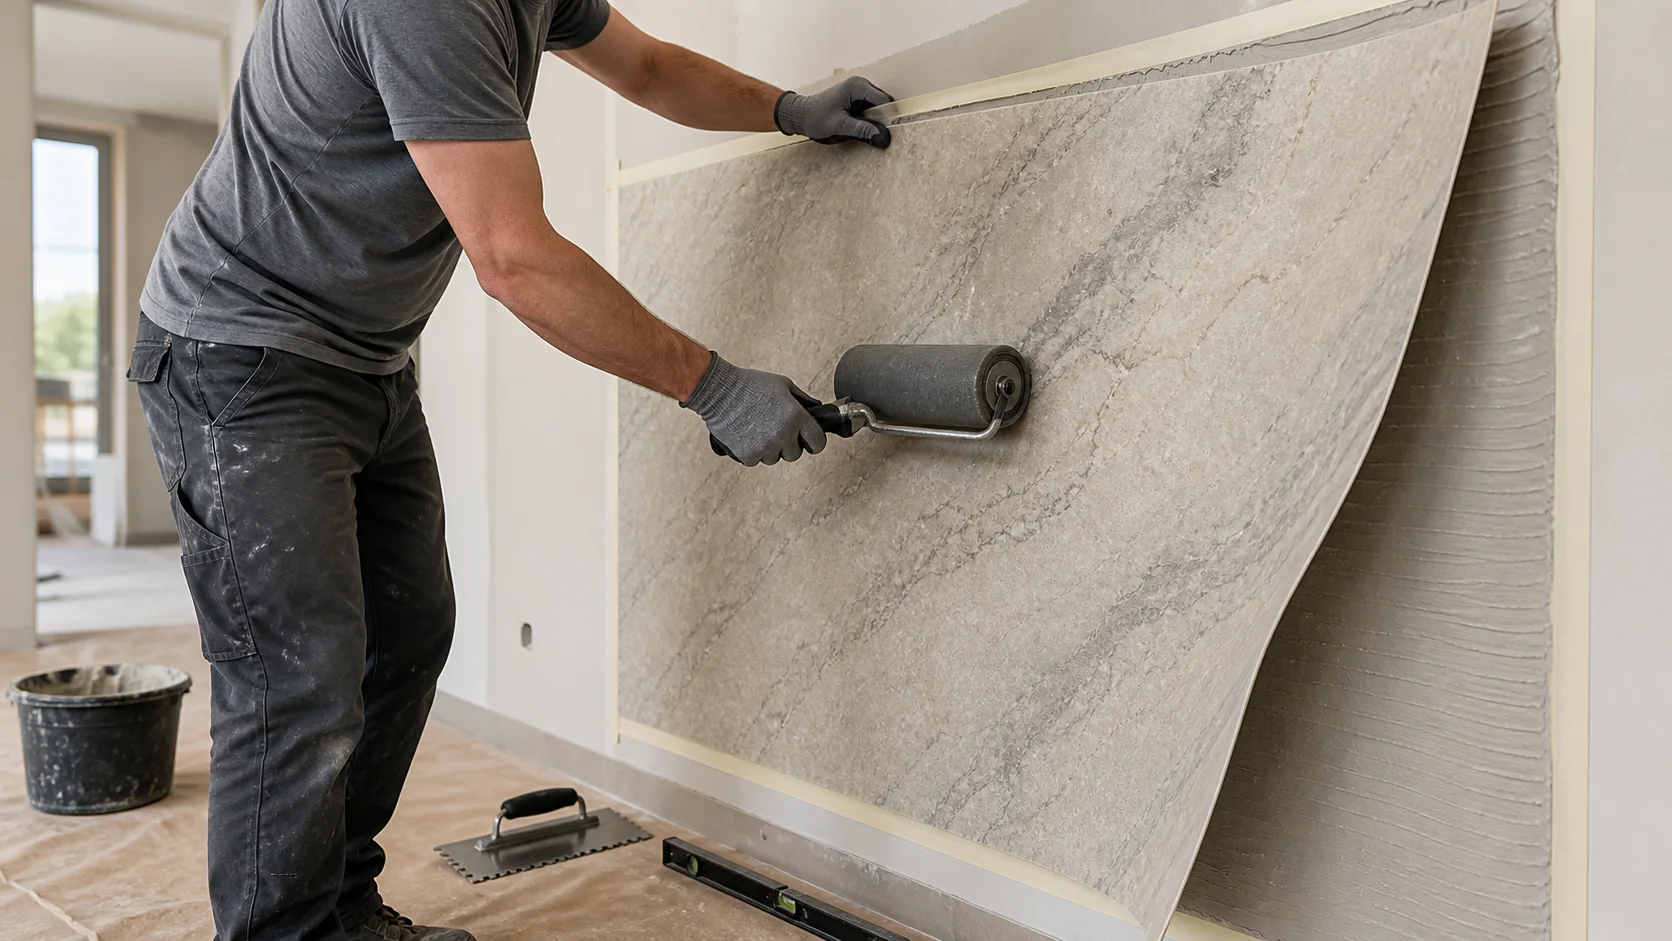
Use these visual references when reviewing the mock-up and work method with the project team.
Site checklist
1. Verify Batch, Backing Type & 24-Hour Flat Acclimatization
Confirm crate labels match the approved SKU, batch, and backing class (fiberglass-polyester vs. textile fleece) in the flexible stone catalog. Lay sheets flat at 50-90°F (10-32°C) for 24 hours before cutting.
Engineering Rule of Thumb: If panels arrive rolled and site temperature is below 65°F (18°C), warm the backing with a heat gun to 120-140°F (50-60°C) before unrolling to prevent stone cleft micro-cracking.
2. Audit Substrate Plane Flatness to ANSI A108.02
Because 1.5-3.0 mm (3.0-6.0 kg/m²) sheets conform directly to the wall under roller pressure rather than bridging waves like 20 mm stone slabs, audit the wall with a 10 ft (3 m) straightedge under grazing light.
Engineering Rule of Thumb: If any board joint or plaster wave exceeds 1.6 mm in 600 mm (1/16 in per 24 in) or 3 mm in 3 m (1/8 in per 10 ft), skim-coat and grind the substrate before layout.
3. Measure Cure Age, MVER & Porosity Before Priming
Verify new concrete and masonry renders have cured at least 28 days. Confirm moisture vapor emission (ASTM F1869 <= 3 lbs / 1,000 sq. ft. / 24 h) and retained moisture (< 2.5%). Review full layer compatibility in Adhesives & Substrates and Existing Surfaces.
Engineering Rule of Thumb: Never bond vapor-tight fiberglass-backed sheets over damp masonry (>= 2.5% moisture); trapped vapor saponifies acrylic adhesives and blisters panels.
4. Sign Off a Full-System Site Mock-Up
Install a 2 to 4 panel (1.5-3.0 m²) mock-up on the receiving wall using the specified primer, notched trowel, adhesive, seam detail, corner trim, and impregnating sealer. Perform a fresh peel/lift check on the first test sheet to confirm >= 80% interior or >= 95% exterior contact bed collapse before releasing production.
Key steps
Step 1: Unpack, Acclimatize & Dry-Lay Panels for Tonal Blending
Unpack sheets
24 hoursbefore installation and store flat at50-90°F (10-32°C). Because natural cleft veneers split from real stone blocks, dry-lay sheets under project lighting, align grain direction (verticalvs.horizontal), and number the backs in sequence (A1, A2, A3...) per your custom-size cut plan.Step 2: Skim, Cure-Check & Prime the Receiving Substrate
Grind high mortar burrs and fill depressions exceeding
1.6 mm in 600 mmwith polymer-modified skimming compound (ANSI A108.02). Vacuum sanding dust and roll an alkali-resistant penetrating primer (0.10-0.20 kg/m²) onto gypsum (ASTM C1396), fiber-cement (ASTM C1325), or render; cure2-4 hoursuntil tack-free.Step 3: Snap Laser Datum Lines & Measure Cut Pieces
Establish a level horizontal starter datum and plumb vertical centerline using a cross-line laser. Never start directly off an unlevel floor slab; snap a laser ledger line for the bottom course and scribe the bottom edge to the floor profile. Measure electrical boxes and frame returns before mixing adhesive.
Step 4: Cut, Drill & Bevel Edges Cleanly
Mark cut lines on the backing or on low-tack masking tape. Make straight cuts with a track-guided circular saw or angle grinder fitted with a continuous-rim diamond blade, cutting from the backside to protect the stone cleft face. Drill penetrations with a diamond hole saw over plywood support per Cutting & Drilling Flexible Stone.
Step 5: Comb Parallel Adhesive Ridges & Back-Butter the Sheet
Mask all four stone face edges (
15-20 mmlow-tack tape) to prevent smears in stone pores. Spread adhesive onto the wall within its15-20 minuteopen time using a3/16 in (4.8 mm)V-notched or4-6 mmsquare-notched trowel at45-60°. Comb all ridges in one parallel direction across the short panel axis, then burnish a0.5-1.0 mmflat back-butter skim across the panel back.Step 6: Seat Panel & Consolidate Outward with a Hand Roller
Align the sheet with the laser datum lines and press the center onto the wall. Immediately roll firmly from the center outward toward the short edges using a hard rubber J-roller (
35-50 lbshand force) to collapse parallel trowel ridges into a continuous bed (>= 80%interior />= 95%exterior contact perANSI A108.5). Never strike the stone face with a mallet.Step 7: Detail Seams, Movement Joints & Impregnating Sealer
Peel edge masking tape before the adhesive skins over. For grouted or caulked seams (
2-5 mm), re-tape edges after24 hours, apply flexible polymer grout or neutral-cure sealant (ASTM C920), tool smooth, and strip the tape immediately. After24-48 hours, apply two thin coats of breathable fluoropolymer or silane-siloxane impregnating sealer per Joints & Sealing.
Engineering Formulas: Panel Takeoff, Adhesive Mass & Thermal Movement Joints
Accurate procurement and expansion detailing prevent batch shortages and thermal buckling on large elevations. Use these four standard engineering equations when preparing bills of quantities and elevation shop drawings:
Gross Cladding Area: A_gross = A_net * (1 + f_waste)
Ordered Panels: N_panels = ceil(A_gross / (L_sheet * W_sheet))
Adhesive Mass: M_adh = A_gross * R_trowel * k_back_butter
Movement Joint Width (TCNA EJ171): W_joint = W_base + 0.0625 in * ((Delta_T - 100°F) / 15°F)
Where:
A_net= net wall area minus openings (m²);f_waste= cut/blending waste factor (0.08for straight bond;0.12-0.15for curved columns or mitered returns)R_trowel= notched-trowel rate (2.2-2.8 kg/m²for4.8 mmV-notch interior MS-polymer;3.5-4.5 kg/m²for6 mmsquare-notch exteriorC2TES1mortar);k_back_butter=1.15(15%panel back-skim allowance)W_base= baselineTCNA EJ171exterior joint width (3/8 in / 9.5 mmat8 ftspacing, or1/2 in / 12.7 mmat12 ftspacing);Delta_T= annual surface temperature swing (T_summer_max - T_winter_min, in°F)
Worked Example 1: 140 m² Hotel Lobby Feature Wall & Curved Columns
Cladding A_net = 140 m² (1,507 sq. ft.) with 1200 x 600 mm (0.72 m²) slate sheets at f_waste = 0.10 and R_trowel = 2.6 kg/m²:
- Gross Area:
A_gross = 140 m² * 1.10 = 154.0 m²(1,658 sq. ft.). - Ordered Panels:
N_panels = ceil(154.0 / 0.72) = 214 sheets(plus5%attic stock =225 sheetsfrom a single production batch). - Adhesive Mass:
M_adh = 154.0 m² * 2.6 kg/m² * 1.15 = 460.5 kg(77 cartonsat6 kgor19 pailsat25 kg).
Worked Example 2: Sunlit Exterior Wall Movement Joint Sizing (TCNA EJ171)
A dark slate facade with vertical joints every 12 ft (3.7 m) (W_base = 0.50 in / 12.7 mm) experiences 145°F summer highs and 15°F winter lows (Delta_T = 130°F):
W_joint = 0.50 in + 0.0625 in * ((130°F - 100°F) / 15°F) = 0.625 in (5/8 in or 16 mm).
Engineering Rule of Thumb: Doubling cementitious skimming thickness from 1/8 in (3 mm) to 1/4 in (6 mm) on an out-of-plane concrete wall cuts 50-lb bag coverage in half (from 46-48 sq. ft. to 23-24 sq. ft.). Audit wall flatness under ANSI A108.02 before signing the installation subcontract.
Curved Walls, Columns & External 90-Degree Corner Detailing
Flexible stone wraps curved columns, reception desks, and arched soffits without segmented facet cuts, provided bend radius, backing temperature, and edge restraint are controlled:
- Minimum Cold vs. Warm Bend Radius: Standard split-slate and sandstone sheets (
1.5-2.5 mmthick) bend safely cold down toR = 250-300 mm (10-12 in)along the longer axis. Tighter radii (R = 150-250 mm / 6-10 in) or denser quartzites require warming the fiberglass-polyester backing to120-140°F (50-60°C)with a heat gun immediately before forming. - Adhesive Restraint on Tight Curves: Cured polyester-fiberglass backing exerts elastic spring-back force below
R = 300 mm. Bond with high-grab MS-polymer adhesive or two-part reaction resin (EN 12004 R2T), and secure panel edges with cargo straps or padded battens for the first6 to 12 hoursof cure. - External 90-Degree Corners: Never fold a fiberglass-backed sheet sharply over a square
90°corner (R < 25 mm). Detail external90°corners using one of three verified methods in Corners & Edges: (1) a 45-degree back-bevel miter joint filled with color-matched stone epoxy, (2) a radiused corner bullnose (R >= 150 mm) wrapped continuously, or (3) an anodized aluminum or brass L-trim / shadow-gap profile.
Engineering Rule of Thumb: Test-bend an offcut from the actual delivery batch around the tightest project radius at site temperature before cutting production sheets; if stone flakes lift along the outer arc, pre-warm the backing to 130°F (55°C) and orient the natural cleft parallel to the cylinder axis.
Dominant Failure Modes, Root Causes & Corrective Engineering Actions
Most flexible stone installation failures trace back to trapped air pockets behind the vapor-impermeable backing, unverified substrate moisture, or missing movement joints. Use the diagnostic matrix below during site quality audits and Troubleshooting inspections:
| Failure Mode | Observable Field Symptom | Root Cause Mechanism | Corrective & Preventive Engineering Action |
|---|---|---|---|
| Hollow-Pocket Blistering & Freeze-Thaw Peel | Drum-like hollow sound under tap test; exterior dome blisters after freeze or solar heating | Swirling adhesive ridges or skipping center-outward roller consolidation leaves air/water voids (< 80% interior / < 95% exterior contact) |
Comb adhesive in parallel lines; back-butter panel rear; roll center-outward with a hard rubber J-roller for >= 95% exterior contact (ANSI A108.5) |
| Substrate Ridge & Board-Joint Telegraphing | Shadow ridges visible across the thin stone face under grazing ceiling cove lights | Substrate exceeds ANSI A108.02 flatness tolerance (> 1.6 mm in 600 mm), and the pliable 2 mm sheet conforms to the bump |
Inspect substrate under final grazing-light angle before priming; feather-skim and sand board joints to <= 3 mm in 3 m (1/8 in per 10 ft) |
| Cohesive Bond Shear or Saponification Detachment | Sheet peels off concrete or gypsum with chalky dust or tacky wet paste on the adhesive face | Bonding over uncured concrete (< 28 days), high vapor emission (ASTM F1869 > 3 lbs / 1,000 sq. ft. / 24 h), or unprimed dusty drywall |
Enforce 28-day concrete cure and < 2.5% moisture; vacuum dust and prime absorptive walls with alkali-resistant acrylic or epoxy primer |
| Cold-Bend Cleft Micro-Cracking & Edge Lift | Hairline fractures along outer column curve or panel edges lifting 2-4 mm off curved walls |
Bending cold fiberglass-backed panels below minimum radius (R < 250 mm) or using low-grab glue without strap restraint |
Warm backing to 120-140°F (50-60°C) before wrapping tight radii; bond with EN 12004 R2T polyurethane or MS-polymer and strap for 6-12 h |
| Seam Tenting & Perimeter Buckling | Butt-jointed panel edges pinch upward or shear along floor, ceiling, or column junctions | Hard-butting sheets against perimeter restraints or bridging structural control joints in violation of TCNA EJ171 |
Leave a 3-6 mm perimeter gap at ceilings, floors, and inside corners; install TCNA EJ171 elastomeric joints (ASTM C920) every 20-25 ft interior / 8-12 ft exterior |
| Permanent Adhesive or Grout Haze in Stone Pores | Milky resin smears or pigmented grout shadow locked inside raw split-slate or travertine pores | Adhesive squeeze-out wiped across raw porous stone with a solvent rag, or grouting seams without masking tape and pre-sealer | Mask all 4 panel edges with low-tack painter's tape before troweling; pre-seal porous travertine/sandstone with breathable impregnating sealer before joint filling |
Standards, Fire Classification & Project Submittal Verification
Commercial interiors, hospitality corridors, and exterior facades require documented compliance across substrate tolerances, bonding mortars, and fire reaction ratings. Because flexible stone sheets are 1.5-3.0 mm composite laminates bonded to a structural backing wall, authority submittals evaluate the complete bonded assembly:
- Substrate Flatness & Surface Preparation (
ANSI A108.02&ASTM C1396/ASTM C1325): Verify drywall framing and cement backer board joints meetANSI A108.02 Section 4.1.4.3.1(<= 3 mm in 3 m). When installing over existing ceramic tile or stone in refurbishments, record tap-test and pull-off bond audits using the Wall Load Review Guide. - Bonding Mortar & Contact Coverage (
ANSI A108.5&ISO 13007 / EN 12004): SpecifyEN 12004 C2TES1/S2(ANSI A118.15) deformable cementitious mortars orEN 12004 R2Treaction-resin adhesives matched to the panel backing. Audit>= 80%dry interior coverage and>= 95%exterior coverage via mock-up lift checks. - Adhered Fire Reaction Testing (
ASTM E84/UL 723&EN 13501-1): UnderASTM E84Steiner Tunnel testing andEN 13501-1classification, thin wall veneers must be tested adhered to a representative non-combustible substrate (such as fiber-cement or gypsum board) with the project-specified adhesive class. Review SKU-specific reports in Fire, Water & Weather Considerations and Testing & Certifications.
Engineering Rule of Thumb: Never submit an unadhered free-hanging sheet test report for a bonded corridor wall submittal; verify the ASTM E84 or EN 13501-1 report matches the exact SKU series, backing family, and non-combustible substrate buildup.
Frequently asked questions
Can flexible stone panels be installed directly over existing ceramic tile or painted drywall?
Yes, if the existing wall passes a 100% tap-test and bond audit. Strip hollow or cracked tiles and patch flush (ANSI A108.02 <= 3 mm in 3 m). Degrease glazed tile, abrade with an 80-grit diamond pad to break the glaze, and apply a quartz-aggregate bonding primer before bonding with EN 12004 R2T polyurethane or MS-polymer adhesive. On painted drywall, perform a cross-hatch tape pull test; if paint flakes, sand to bare board or fasten ASTM C1325 cement board. See Installing Over Existing Surfaces.
Why do flexible stone panels require a hand roller instead of a rubber mallet or grout float?
Because flexible stone veneers are 1.5 to 3.0 mm thick, striking the face with a rubber mallet creates point impacts that indent the substrate or fracture natural slate laminations while leaving adjacent air pockets intact. Rolling from the center outward with a hard rubber J-roller (35-50 lbs force) collapses parallel 3/16 in (4.8 mm) trowel ridges evenly to achieve the >= 80% interior or >= 95% exterior contact area mandated by ANSI A108.5.
How tight a curve can flexible stone panels wrap without cracking the stone face?
Standard 1200 x 600 mm split-slate and sandstone sheets bend cold around a 250 to 300 mm (10 to 12 in) radius along their length. For tighter columns down to 150 to 250 mm (6 to 10 in) radius, or denser quartzite sheets in cool ambient conditions (< 65°F / 18°C), warm the polymer-fiberglass backing evenly to 120-140°F (50-60°C) with a heat gun immediately before forming, and restrain wrapped edges for 6-12 hours while the adhesive cures.
Should flexible stone panels be installed with tight butt joints or grouted seams?
In climate-controlled dry interiors, calibrated panels are often installed with tight 0-1 mm butt seams for a monolithic look, provided TCNA EJ171 movement joints (every 20-25 ft) are maintained. On exterior facades, sunlit atrium walls, or coursed-ashlar layouts, spacing panels with a 2 to 5 mm joint filled with flexible polymer mortar or ASTM C920 neutral-cure elastomeric sealant accommodates thermal expansion (every 8-12 ft) and seals edges against moisture.
How do you remove fresh adhesive squeeze-out from rough cleft slate or travertine without staining?
Apply 15-20 mm low-tack painter's tape along all four face edges of each sheet before troweling adhesive. If MS-polymer or polyurethane adhesive contacts unmasked raw stone, never wipe sideways with a solvent-soaked rag, which drives dissolved resin into cleft pores. Lift the bulk off immediately with a wooden spatula, dab gently with the approved cleaner inside the mock-up test zone, or pre-seal porous travertine and sandstone faces with a breathable impregnating sealer prior to installation.
Can flexible stone wall panels be used inside shower stalls, wet rooms, or on floors?
No. Flexible stone wall panels in our commercial catalog are engineered specifically for dry interior walls, curved columns, suitable renovation walls, and project-approved exterior wall facades. They are not specified for floor traffic, point loads, shower enclosures, steam rooms, pools, or unshielded high-heat cooking splashbacks.
Continue planning
Use these related guides before fixing details or releasing material.
Choose adhesives & substrates
Match MS-polymer, polyurethane (EN 12004 R2T), and deformable C2TES1/S2 adhesives to your wall substrate.
Read morePlan corners & joints
Detail curved wraps, 45-degree mitered returns, and metal edge profiles before cutting sheets.
Read moreDetail joints & sealing
Specify TCNA EJ171 movement joints, butt vs. grouted seams, and breathable impregnating sealers.
Read moreWhat to send us
Scroll the table horizontally to see all columns.
| Item | Why we need it | Example format |
|---|---|---|
| Substrate assembly and cure / moisture state | Verify flatness tolerance (ANSI A108.02) and primer / adhesive class | Wall buildup description, cure age, moisture reading and site photos |
| Wall elevations, curves and net area (m2) | Calculate gross sheet count, cut waste and movement joint layout | Dimensioned PDF elevation with openings, curve radii and lighting direction |
| Target SKU, sheet format and seam detail | Match backing type (fiberglass-resin vs fleece) to adhesive and corner trim | Product code, sheet size (1200x600 or 2400x1200 mm) and butt vs grouted seam choice |
| Exposure zone and fire / compliance submittals | Confirm interior vs exterior adhesive coverage (80% vs 95%) and ASTM E84 / EN 13501-1 files | Room or facade exposure notes and required authority submittal checklist |
| Delivery city / port and target installation window | Align pallet / crate packing, acclimatization lead time and freight scope | Destination city/country or port and site mobilization date |
We reply within 24 hours.
Send your project details