Custom-Size Flexible Stone: Wall Grid and Cut Schedule
Updated
Ordering custom-size flexible stone from wall area alone leaves the buyer to resolve missing pieces and cutting scope later. Prepare a dimensioned wall grid and numbered cut schedule, then ask us to confirm the supply sizes for the selected flexible-stone finish.
Define the pieces you want us to quote
Send the finish/SKU, measured wall elevation, openings, texture direction, joint details and a piece list in the same drawing revision. Identify which dimensions describe requested finished pieces and which cuts remain on site. We review custom-size feasibility against the selected product and physical sample; the agreed supply dimensions and packing belong in the written order confirmation.
This worksheet covers dry interior wall cladding. Use the custom-development process when the catalogue format needs a change; start with standard samples when an existing finish may suit the wall. A bespoke format does not automatically reduce the total work.
| Input | Reference to send | Problem it prevents |
|---|---|---|
| Finish and SKU | Product link and physical sample reference | Cutting the right shape in the wrong finish |
| Wall geometry | Dimensioned elevation with survey status | Pricing pieces from an unverified drawing |
| Direction and joints | Face arrows and approved detail references | Rotated texture or a layout that does not close |
| Supply and site cuts | Numbered piece schedule with responsible party | Paying twice for the same cutting scope |
| Quantity and destination | Piece counts, separate spares and receiving zones | Missing pieces or undefined packing scope |
Separate nominal size, supply size and coverage
Ask the supplier to confirm finished face dimensions for every requested piece. A nominal catalogue size supports planning; installed coverage also depends on the agreed joints, perimeter details and trimming. Keep those fields separate in the schedule, using the selected SKU's dimension information.
| Dimension | What to record | Failure mode and prevention |
|---|---|---|
| Nominal sheet | Catalogue format and document revision | Assumed usable area: confirm actual dimensions and trimming |
| Requested supply piece | Width × height, units and edge detail | Ambiguous “custom size”: specify the finished face being requested |
| Installed coverage | Wall location and approved joint/perimeter details | Layout overrun: reconcile pieces and allowances with the elevation |
| Site cut | Piece ID, cut location and responsible party | Unpriced field work: identify who measures and completes the cut |

Use the physical sample to approve appearance. Confirm supply dimensions separately against the product reference and drawing.
Check a wall grid before counting pieces
Give each wall a zone ID and each piece a mark that survives revisions. Show openings, returns, adjacent joinery and retained movement details on the elevation. Distinguish surveyed measurements from design-stage dimensions; use the corners and joints guidance to identify the details that need coordination.
For a single straight row of equal-width pieces, the geometry is:
Finished face width w = [W − 2p − (n − 1)j] ÷ n
Here W is the wall-field width, p is the allowance at each end, n is the number of pieces and j is the internal joint width. This expression assumes equal end allowances and uniform joints, with no opening within the row. It does not calculate cutting kerf or stock-sheet yield.
Worked example with assumed inputs only: W = 2,400 mm, n = 3, p = 8 mm and j = 4 mm gives w = [2,400 − 16 − 8] ÷ 3 = 792 mm. Check: 3 × 792 + 2 × 4 + 2 × 8 = 2,400 mm. These are arithmetic assumptions, not recommended joints, available panel sizes or manufacturing tolerances; the project designer and supplier must confirm the actual inputs.
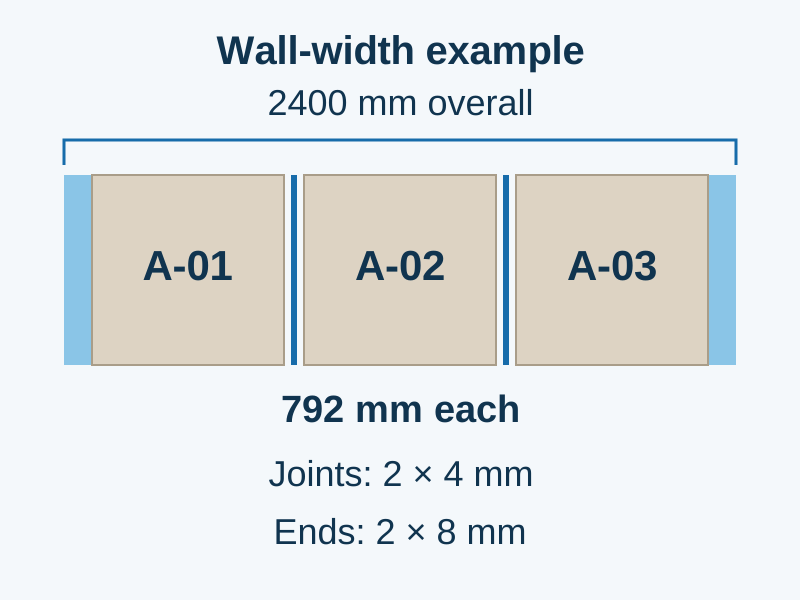
Width check for the hypothetical row. Schematic, not to scale; the drawing exaggerates the joints and end allowances for visibility.
Hold the affected row if its dimensions do not reconcile with the elevation, or if a site measurement or supply dimension is still unresolved. The amount of permissible dimensional variation comes from the selected product and approved detail, rather than a category-wide rule.
Fill the cut schedule and assign site work
Use one row per piece definition. Group repeated pieces only when the finish, dimensions, face direction, edges and cutting scope match. Keep requested dimensions beside the supplier's response so reviewers can see any change.
The example below carries the three grid IDs into a schedule. Height remains unresolved because the worked example checks width only; these rows are ready for a discussion, not production release.
| Piece / zone | Requested face W × H (mm) | Qty | Direction / edge | Supply response / site work |
|---|---|---|---|---|
| A-01 / Wall A | 792 × height to verify | 1 | Direction per sample; left perimeter detail pending | Size feasibility pending; final measurement owner to name |
| A-02 / Wall A | 792 × height to verify | 1 | Same face direction; internal joints | Size feasibility pending; no opening specified |
| A-03 / Wall A | 792 × height to verify | 1 | Same face direction; right perimeter detail pending | Size feasibility pending; final measurement owner to name |
For a live order, add the SKU/sample reference, drawing revision, confirmed supply width and height, edge-detail reference, opening dimensions and locations, cutting responsibility, and pack-group reference. Mark uncertain fields “to confirm”. A socket or door cutout needs its own location and detail reference; the rectangular piece's outside dimensions do not define it. Keep physical tool selection and cutting instructions in the cutting and drilling guide.
Allocate offcuts by shape and direction
Accept a proposed offcut only after checking its usable width and height, face direction and edge condition against a named receiving piece. Equal areas can have incompatible shapes. Record the source piece and receiving piece IDs, with cutting allowance subject to the selected fabrication method.
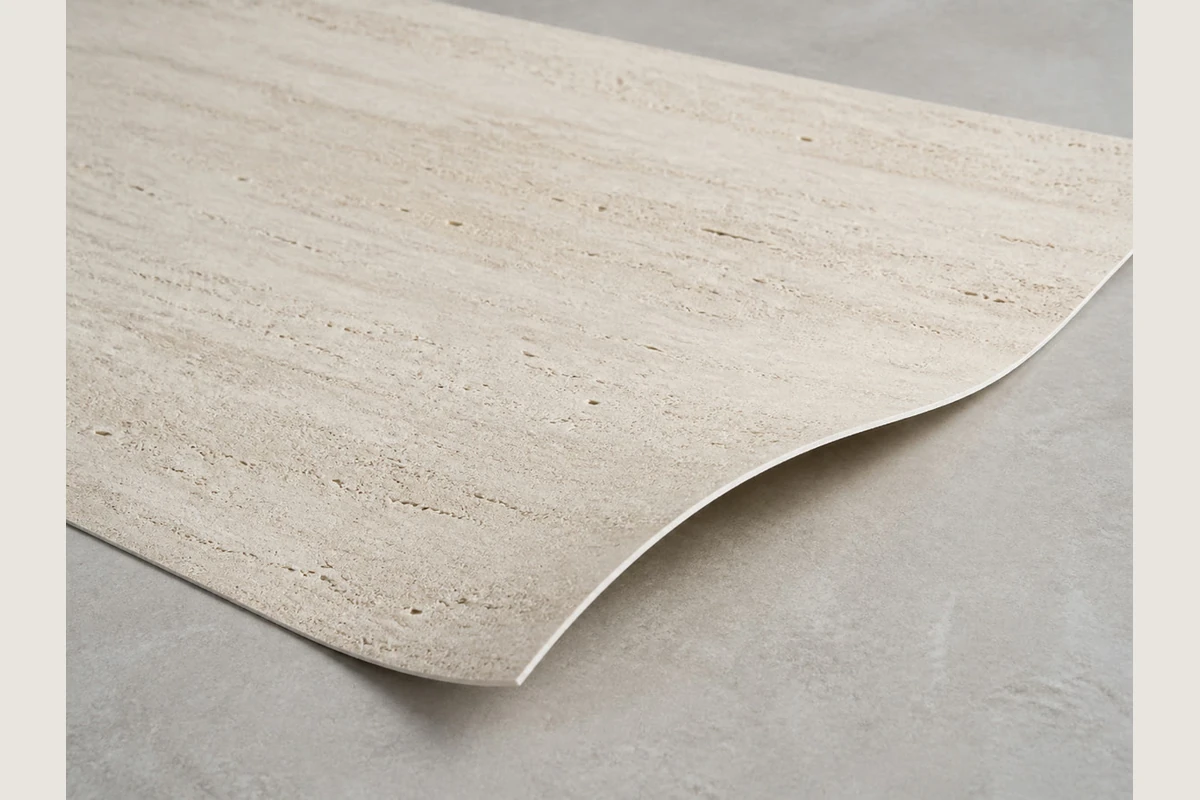
A directional surface gives each remnant an orientation as well as an area. Check the intended face direction before allocating it to another piece.
Keep unallocated remnants out of the required-piece count. List spares separately by finish, dimensions and replacement zone. Use the buying guide's quantity planning to compare the actual layout with available formats, rather than applying an assumed waste percentage.
Compare cutting and packing scope before accepting a quote
Compare offers against the same revision and the same remaining site work. A smaller material total can leave more measuring, cutting or sorting for the installer. Ask each offer to identify these cost items without assuming a saving:
| Cost item to compare | Record in the quotation | Failure mode and prevention |
|---|---|---|
| Supplied cutting and edges | Included pieces, edge treatment and unresolved cuts | Duplicate or omitted work: assign each operation once |
| Site measurement and cutting | Responsible party and remaining piece IDs | Rework after survey: close measurement holds before release |
| Remnants and spares | Accepted reuse allocations and separate spare counts | Short order: count usable pieces rather than leftover area |
| Grouping and protection | Proposed zones, pack marks and protection method | Site sorting or repacking: confirm the actual arrangement |
Propose a traceable reference such as Revision B / Wall A / A-01–A-03. This is an example document mark, not an existing shipping label. Ask how the agreed packing list will carry the zone, piece range, product/batch reference and quantity. Confirm the available marking and grouping method through the packing and shipping review.
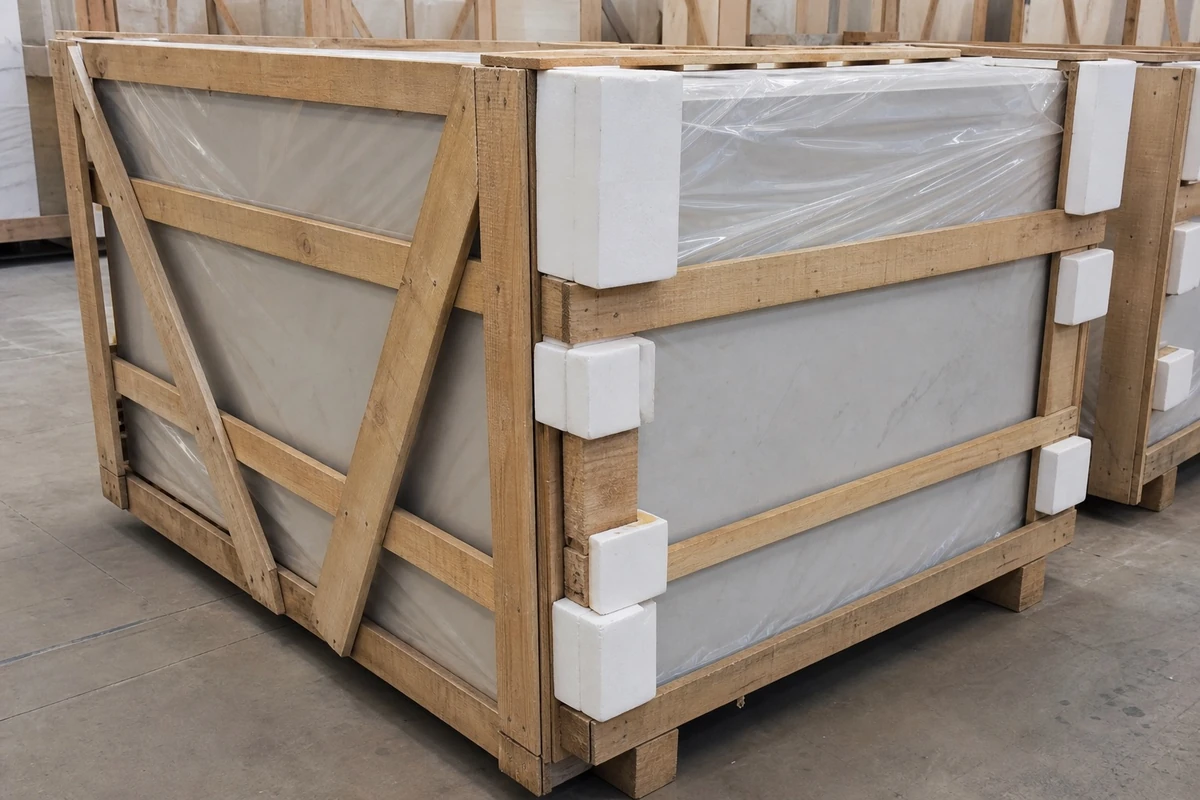
Protection reference for the packing discussion. Agree the actual pack grouping, piece count and marks against the accepted schedule.
Release one revision and send it for review
Release the coordinated drawing and schedule after the measurement owner, finish approver and supplier have closed the relevant items:
- Elevation, openings, piece IDs and quantities match the same revision.
- The listed SKU and direction match the physical approval sample.
- Requested and confirmed finished dimensions agree, including edge scope.
- Remaining site cuts have a named measurement and cutting owner.
- Spares, accepted offcut allocations and packing requirements are explicit.
If a wall or opening changes, identify every affected piece and reissue the coordinated revision. Keep superseded rows identifiable so the receiving team can distinguish them from the current order.
What to send us
| Item | Why we need it | Example format |
|---|---|---|
| Finish / SKU and sample | Identify the product and appearance reference | Product link plus named approval sample |
| Wall grid and openings | Review the requested geometry | Dimensioned elevation with units and survey status |
| Cut schedule | Review sizes and supply/site responsibilities | Piece ID, W × H, quantity, direction, edges and revision |
| Packing proposal | Discuss protection and receiving zones | Zone, piece range and requested marks |
| Destination and requested dates | Review order and shipping scope | City/country or port, sample and order targets |
Send the grid and schedule with a project quote request, or request finish samples before developing the layout further. Custom-size limits, tolerances, minimum quantity, price, timing and packing arrangements need confirmation for the selected order.
Method and sources
Updated 18 October 2026. The worksheet follows HeyMaterials' published custom-development inputs, dimension definitions and packing scope, checked on this date against the retained source records. The grid, IDs and filled rows are planning examples; the calculation uses declared assumptions.
As an external layout reference, the preparation section of the 2026 natural-stone veneer instructions (page 1) calls for arranging those sheets before work. That instruction concerns a different material and supports the appearance-sequencing principle only; it supplies no HeyMaterials dimensions or installation limits. This page addresses the order brief for dry interior walls; wall-system design and cutting methods require their own project details.
What to send us
Scroll the table horizontally to see all columns.
| Item | Why we need it | Example format |
|---|---|---|
| Finish / SKU and sample | Identify the product and approval reference | Product link and labelled sample photo |
| Wall grid and openings | Locate the requested pieces | Dimensioned elevation with measurement status |
| Direction and joint details | Connect appearance to geometry | Arrows and detail references on the elevation |
| Cut schedule and quantities | Define requested supply and site work | Piece list with declared units and revision |
| Packing marks and destination | Discuss grouping, protection and shipment scope | Zone-mark proposal and city/country |
We reply within 24 hours.
Send your project details